Storyline 3: Best Practices for High Quality Images and Videos
Article Last Updated
This article applies to:
For the highest quality media in your Storyline 3 courses:
- Use Images and Videos That Don't Need to Be Resized
- Adjust the Compression Settings in Storyline
- Lock the Storyline Player at Optimal Size
Use Images and Videos That Don't Need to Be Resized
Start with high quality images and videos that are already properly sized for your course. Scaling media up or down in your course can cause blurriness, especially if your images and videos have text.
Best Practice: Don't shrink or stretch media in your course.
If images and videos are bigger than your slides, they'll automatically be scaled down to fit, which can result in a loss of quality. Here are some tips for working with large images and videos:
|
Images |
Videos |
|
|
If you make small images and videos larger than their original sizes, they may become fuzzy. Here are some tips for working with small images and videos:
|
Images |
Videos |
|
|
Adjust the Compression Settings in Storyline
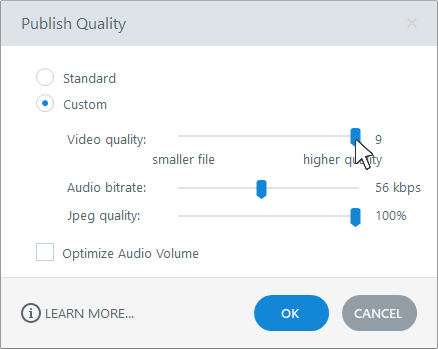
You can adjust the compression settings Storyline uses for videos and JPG images when you publish your course. Just click the Quality property in the publishing wizard, then drag the Video quality and Jpeg quality sliders. (Note that higher quality values also result in larger file sizes, which could mean longer download times for learners with slow internet connections.)

Also, if you're using MP4 videos (created with baseline, main, or high profiles), you can turn off compression altogether for the highest quality. Select each video placeholder in your course, go to the Options tab on the Storyline ribbon, and change the Compression to None.
Tip: As of November 2022, we improved how Storyline 3 handles images during import and in the published output, resulting in crisper images.
Lock the Storyline Player at Optimal Size
To prevent your published course and the media it contains from scaling and becoming blurry, we recommend locking the Storyline player at optimal size, which is your slide size plus some additional width and height to accommodate the player frame.
- Go to the Home tab on the Storyline ribbon and click Player.
- When the player properties window opens, click Other on the ribbon.
- Set the Player size to Lock player at optimal size.
- Click OK to save your change.
To learn more about the player sizing options, see this user guide.


